
From Slack export to signed postmortem in three minutes
The first time you use IncidentScribe, the question is “where do I start.” The answer is shorter than you’d expect.
Here’s a complete walkthrough using a real sample — a memory-leak incident in a PDF generation worker — from raw Slack export to signed-off, exported postmortem. Total wall time on Apple Silicon: about three minutes.
What you start with
The input for this walkthrough is a Slack export from an #incidents channel during a SEV2 incident. The PDF worker started OOMing at 09:14, latency p95 blew past the SLA at 09:30, the on-call team identified a runaway template cache in libpdfgen v2.3 (an upgrade from the previous week), downgraded to v2.2 to stop the bleeding, and shipped a bounded-cache hotfix as the durable fix. The full Slack export is about 90 lines of timestamped chat, plus inline alertbot pages.
You could write the postmortem from memory, alone, with a Confluence template. You’d remember the bullet points but forget who said what when. The version IncidentScribe drafts is grounded in the export and cites every claim.
Step 1 — Import (≈10 seconds)
Open IncidentScribe. Click the + toolbar button (or press ⌘N). The import sheet opens. Drag the Slack export .txt onto it, or paste the conversation directly into the text area. Click Import.
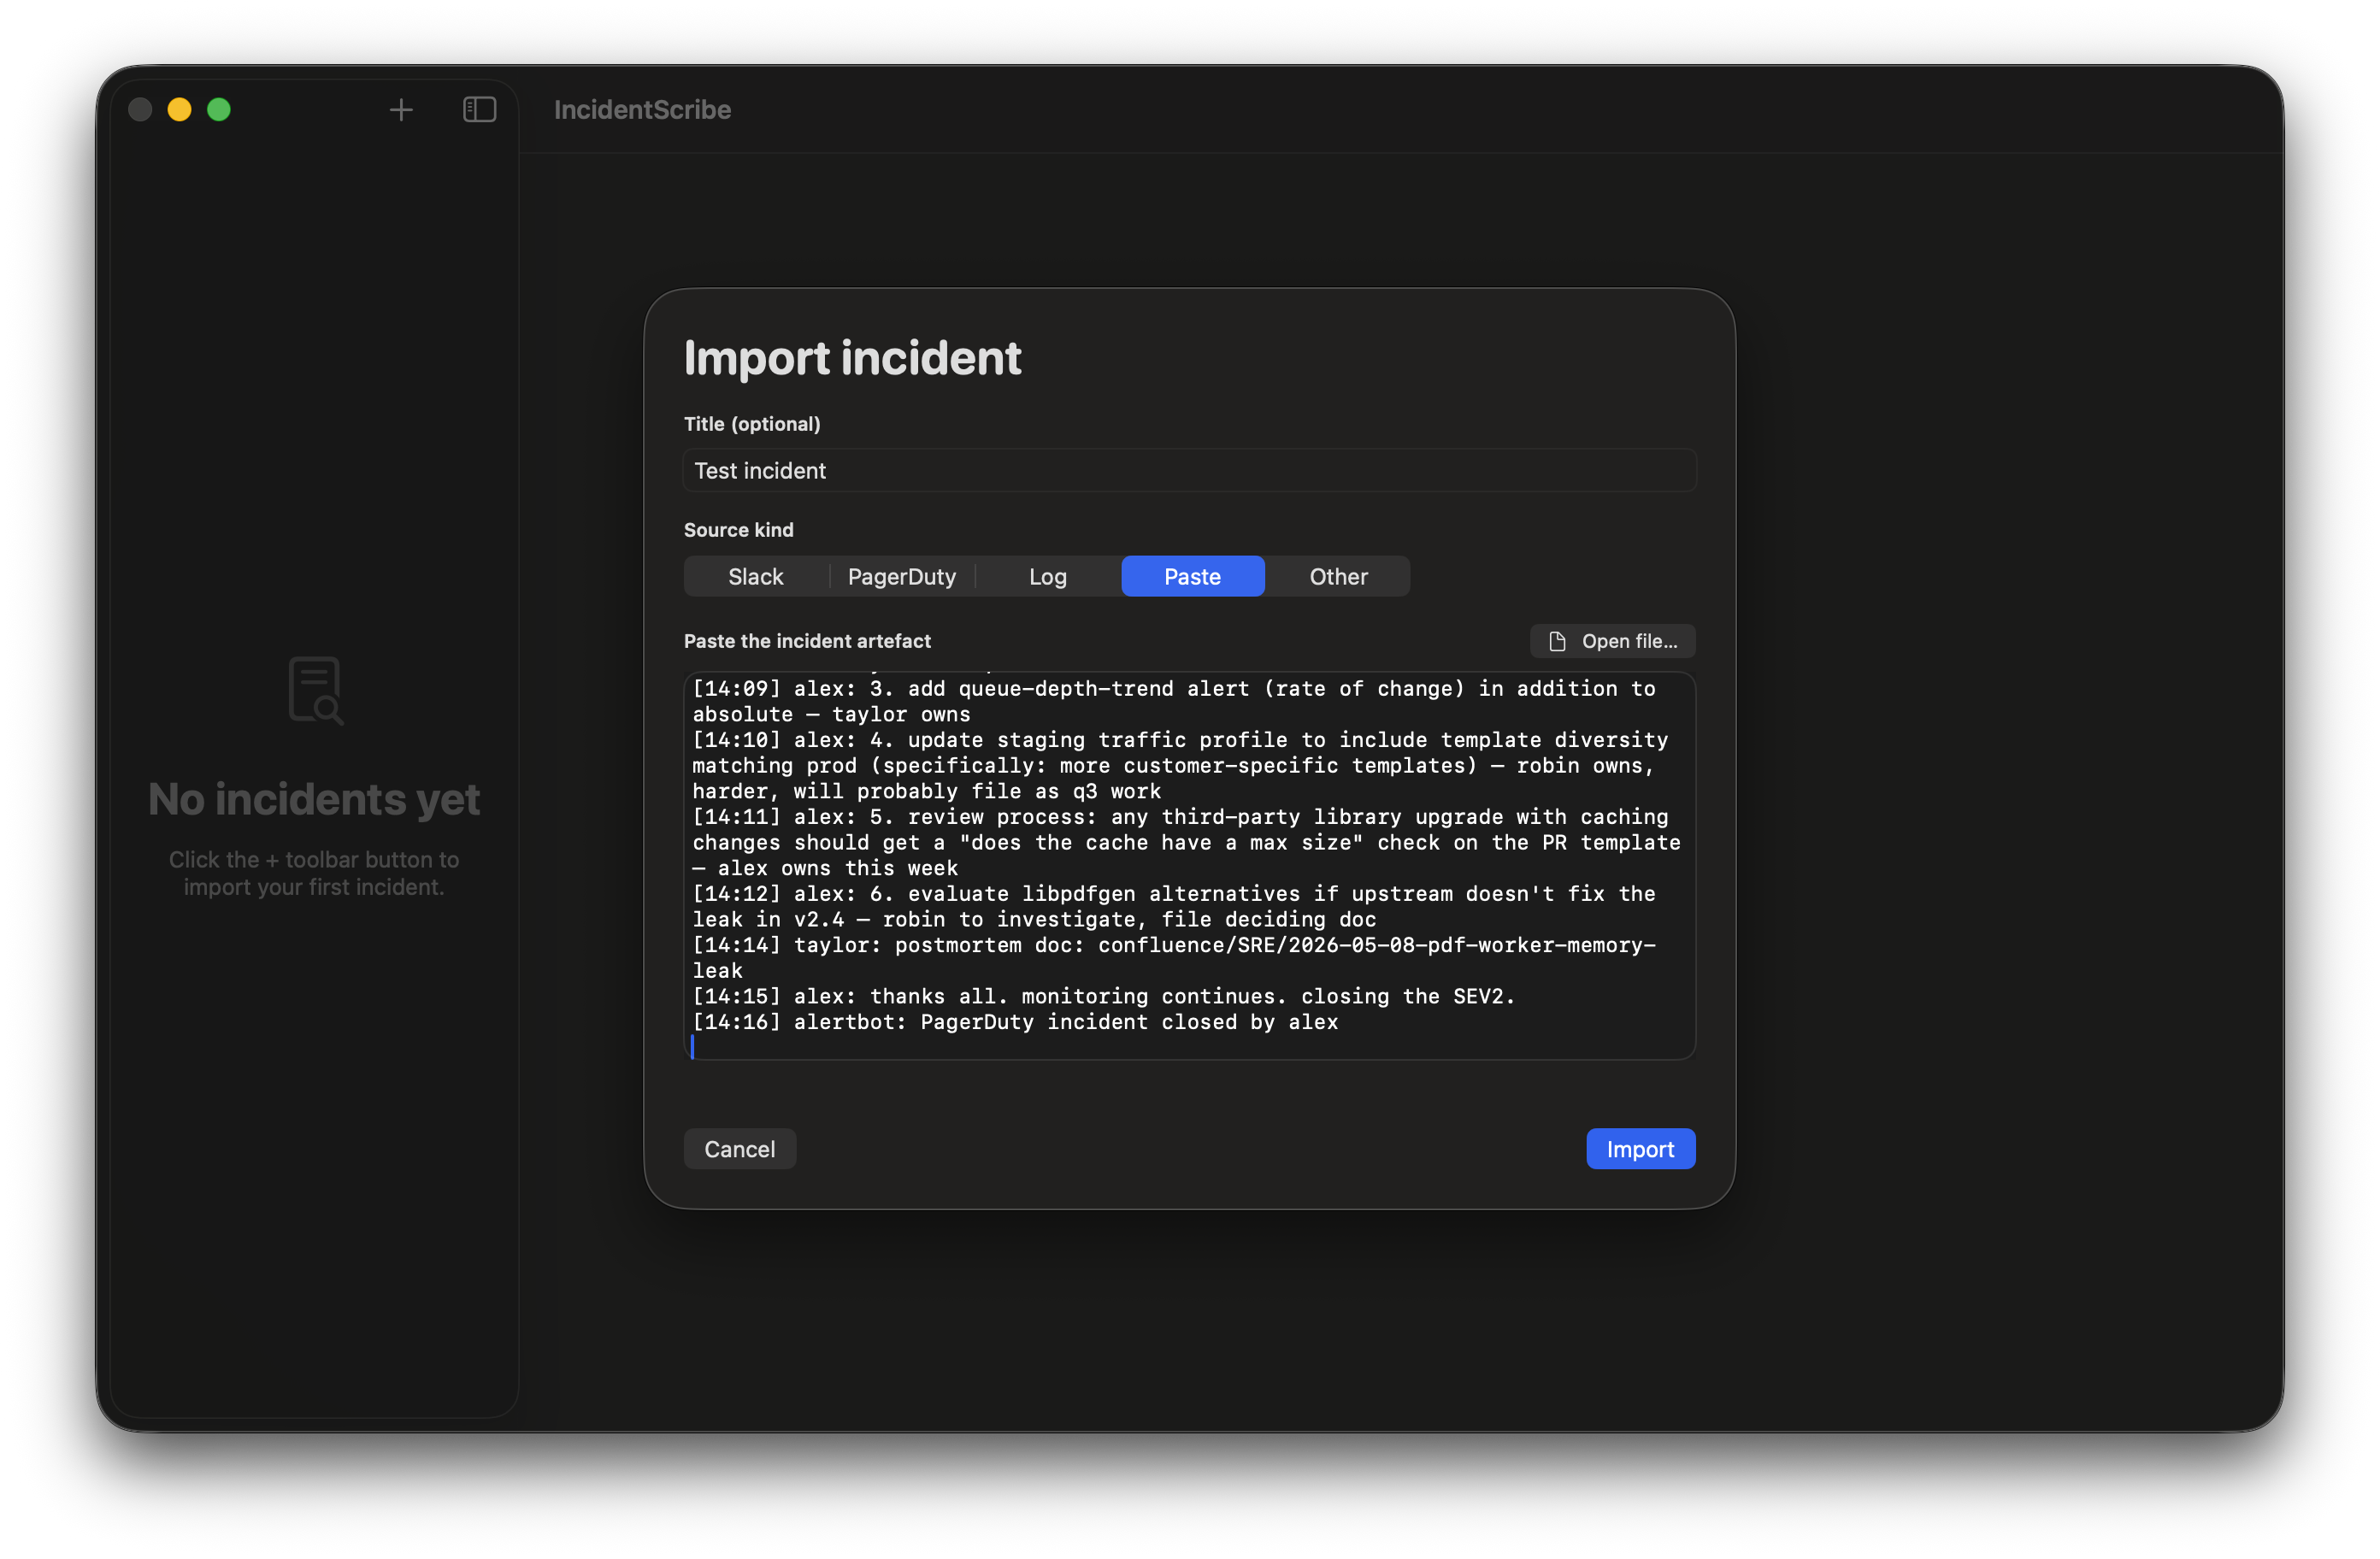
The app auto-detects the source type (Slack export, in this case — by the [HH:MM] timestamp pattern), creates the incident record in the sidebar, and immediately begins extraction.
Step 2 — Timeline extracts (≈30–60 seconds)
The Timeline view opens. As Apple’s on-device Foundation Models process each chunk, structured events appear in the timeline pane, top to bottom, as they come back. You’ll see something like:
- 09:14 — alertbot paged SEV3 for worker queue depth
- 09:15 — taylor acked, started investigating
- 09:17 — taylor observed OOM events on PDF workers specifically
- 09:20 — taylor paged robin with a hypothesis about the libpdfgen upgrade
- 09:26 — robin identified the unbounded template cache (340MB per worker vs 12MB pre-upgrade)
- 09:30 — alertbot paged SEV2 — customer-facing latency now affected
- 09:35 — taylor + robin chose libpdfgen v2.2 downgrade as the stop-the-bleeding move; v2.3 hotfix to follow
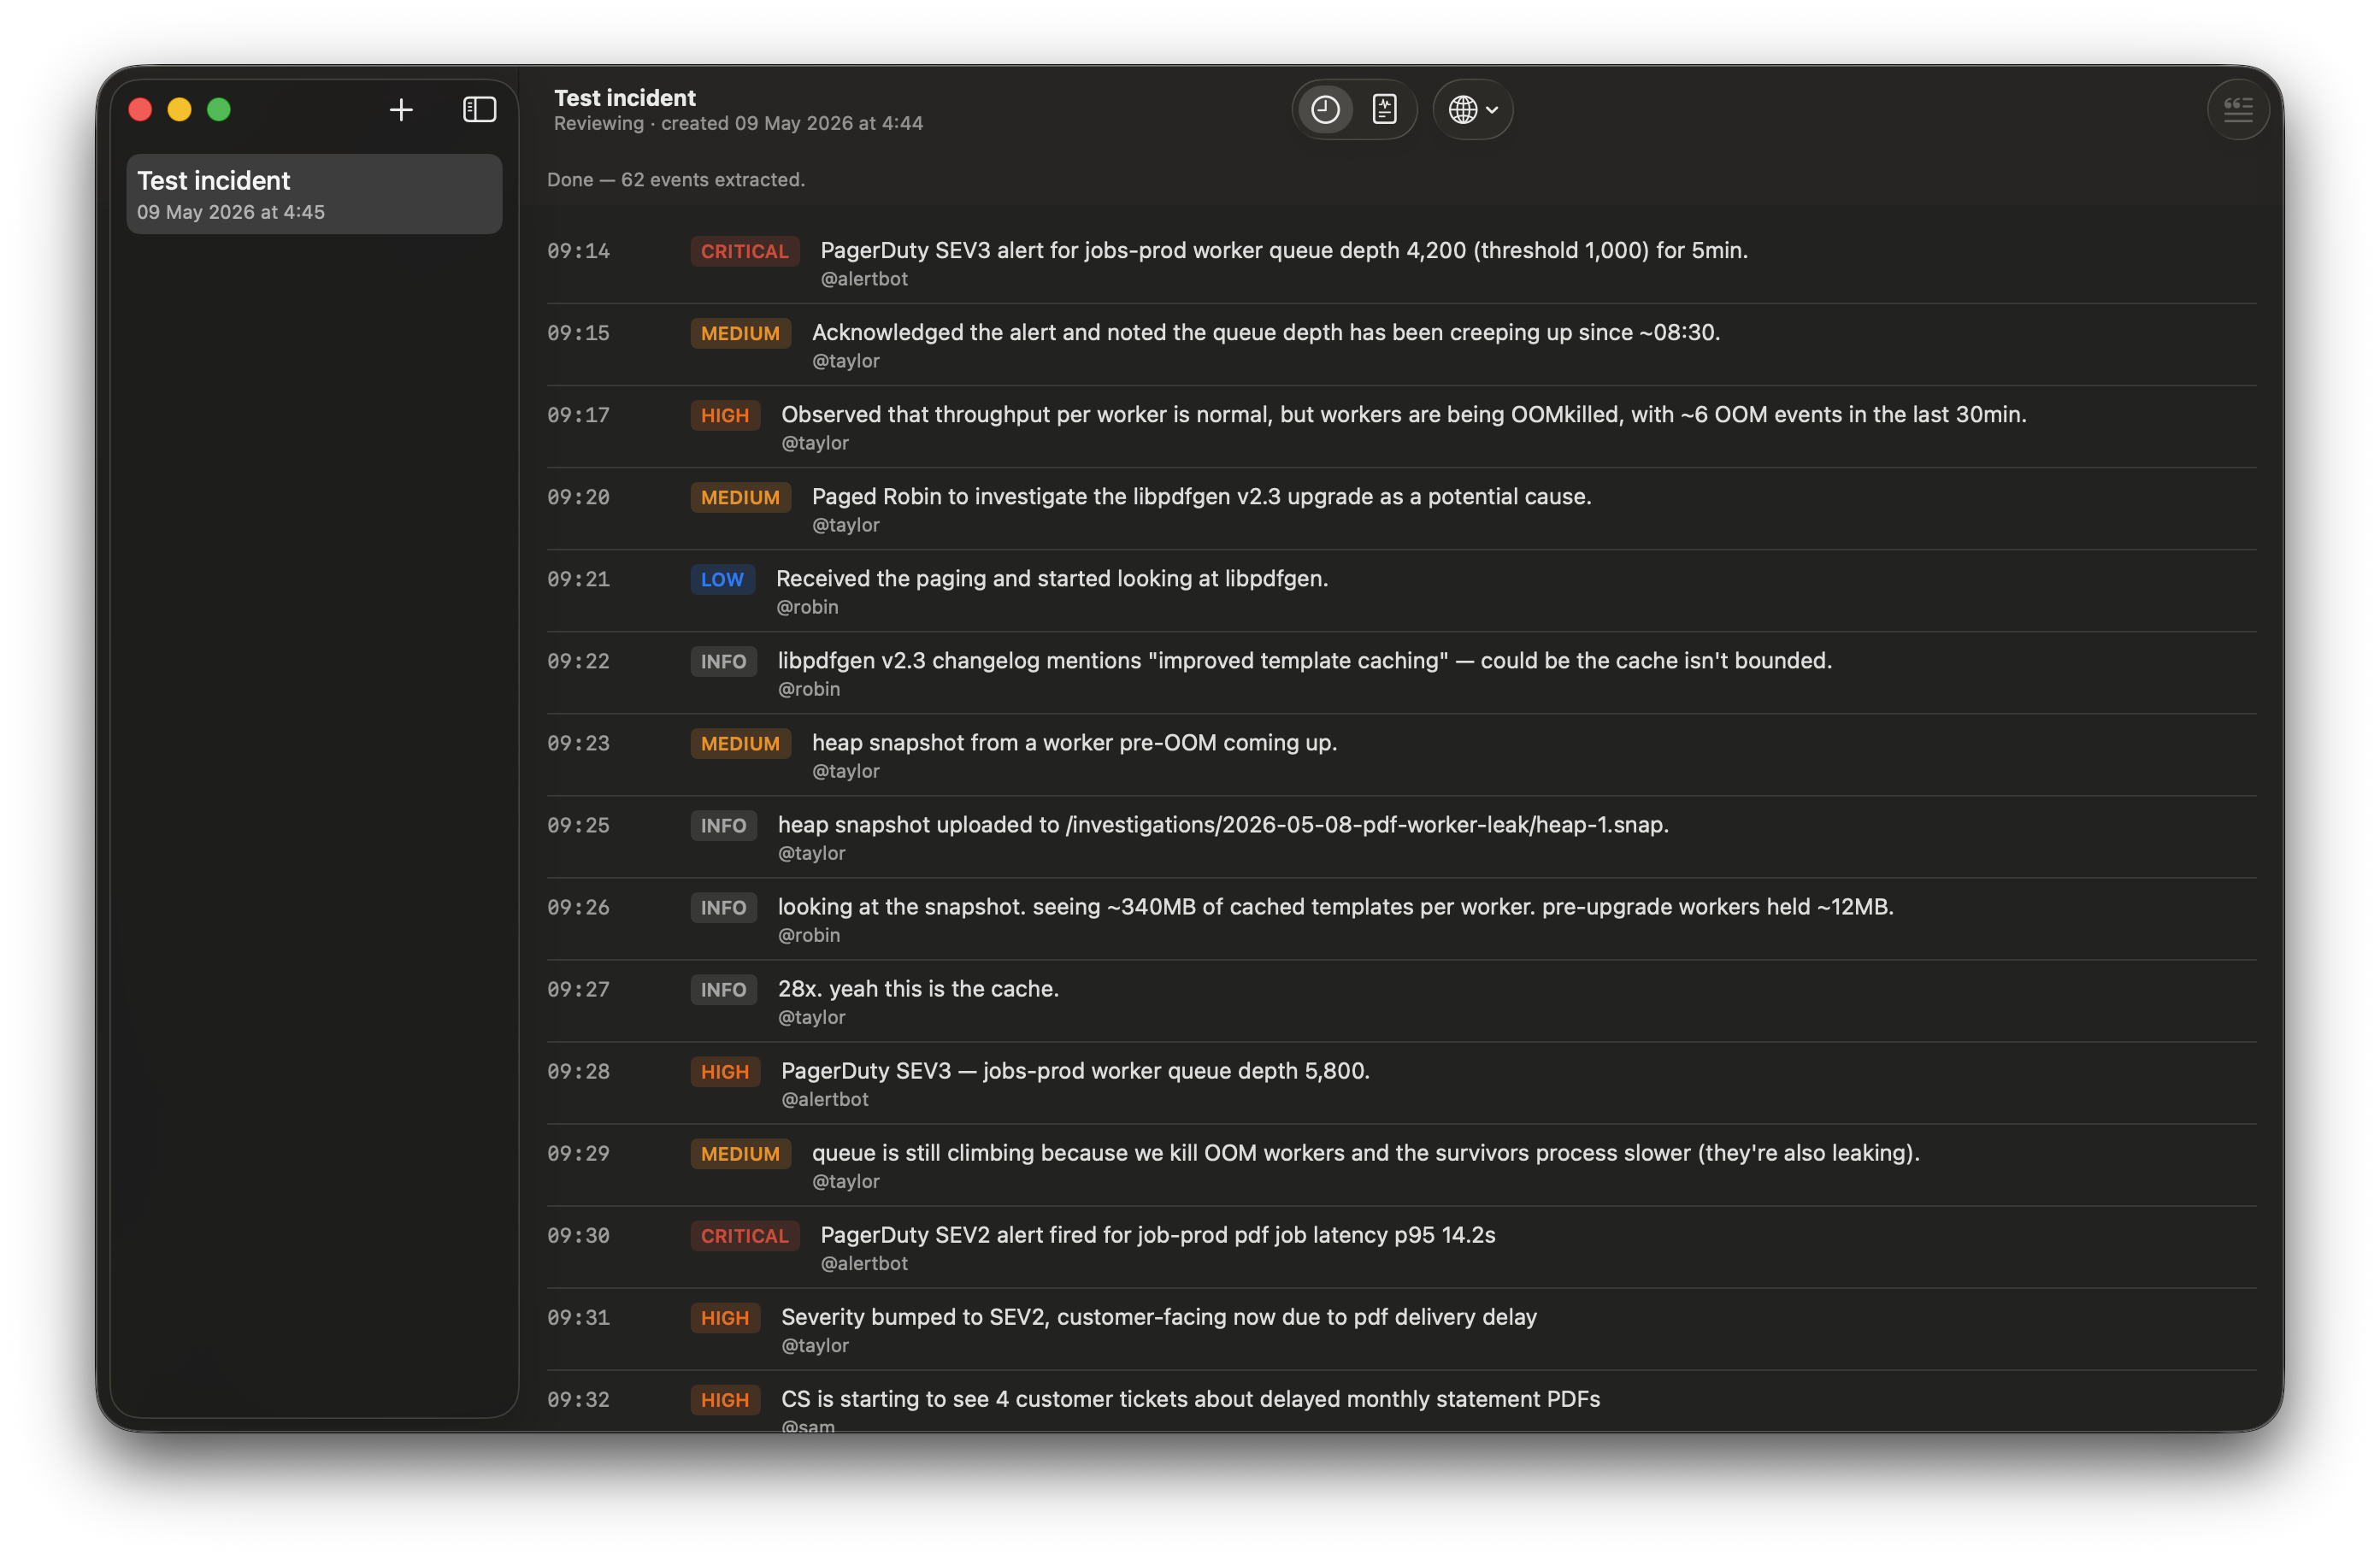
Every event’s actor and timestamp were verified back against the source export before landing in the timeline. Events whose actor was inferred (rather than a literal substring of the source) got dropped silently. That’s the validation pass; you don’t see it unless you go looking.
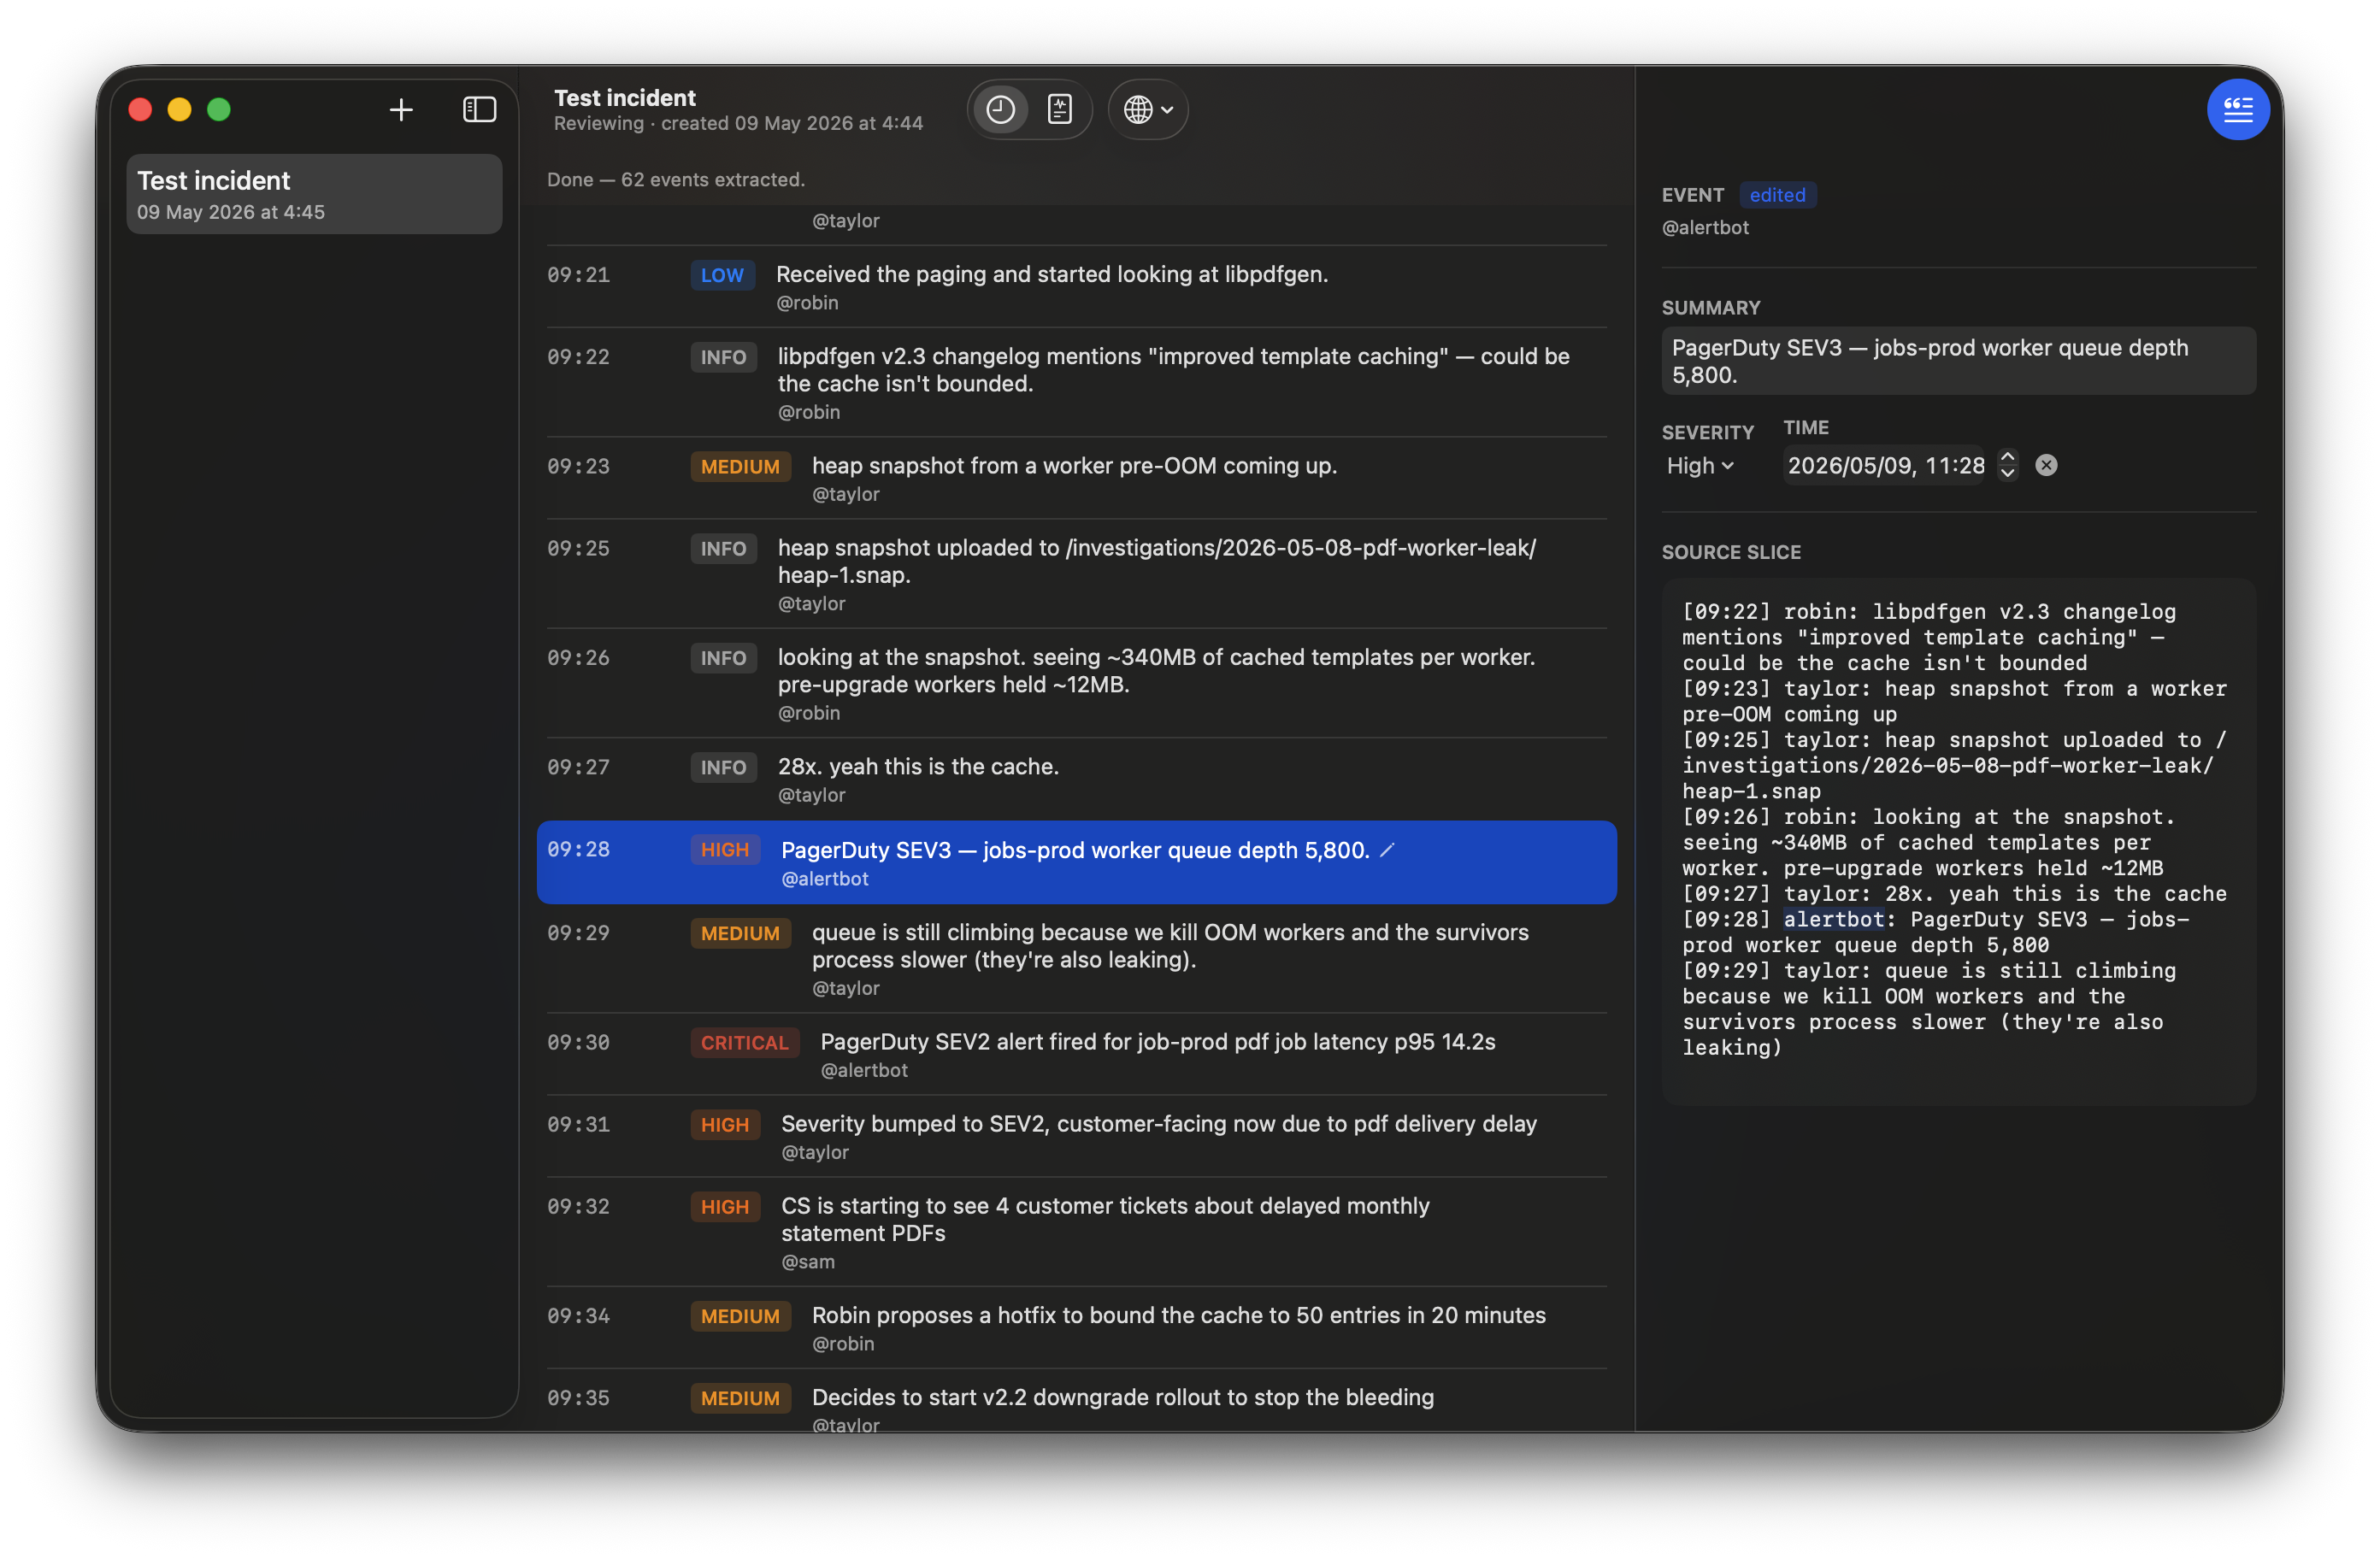
You can click any event to open the source slice on the right, with the actor name highlighted in the original Slack message:
Step 3 — Draft the five postmortem sections (≈60–90 seconds)
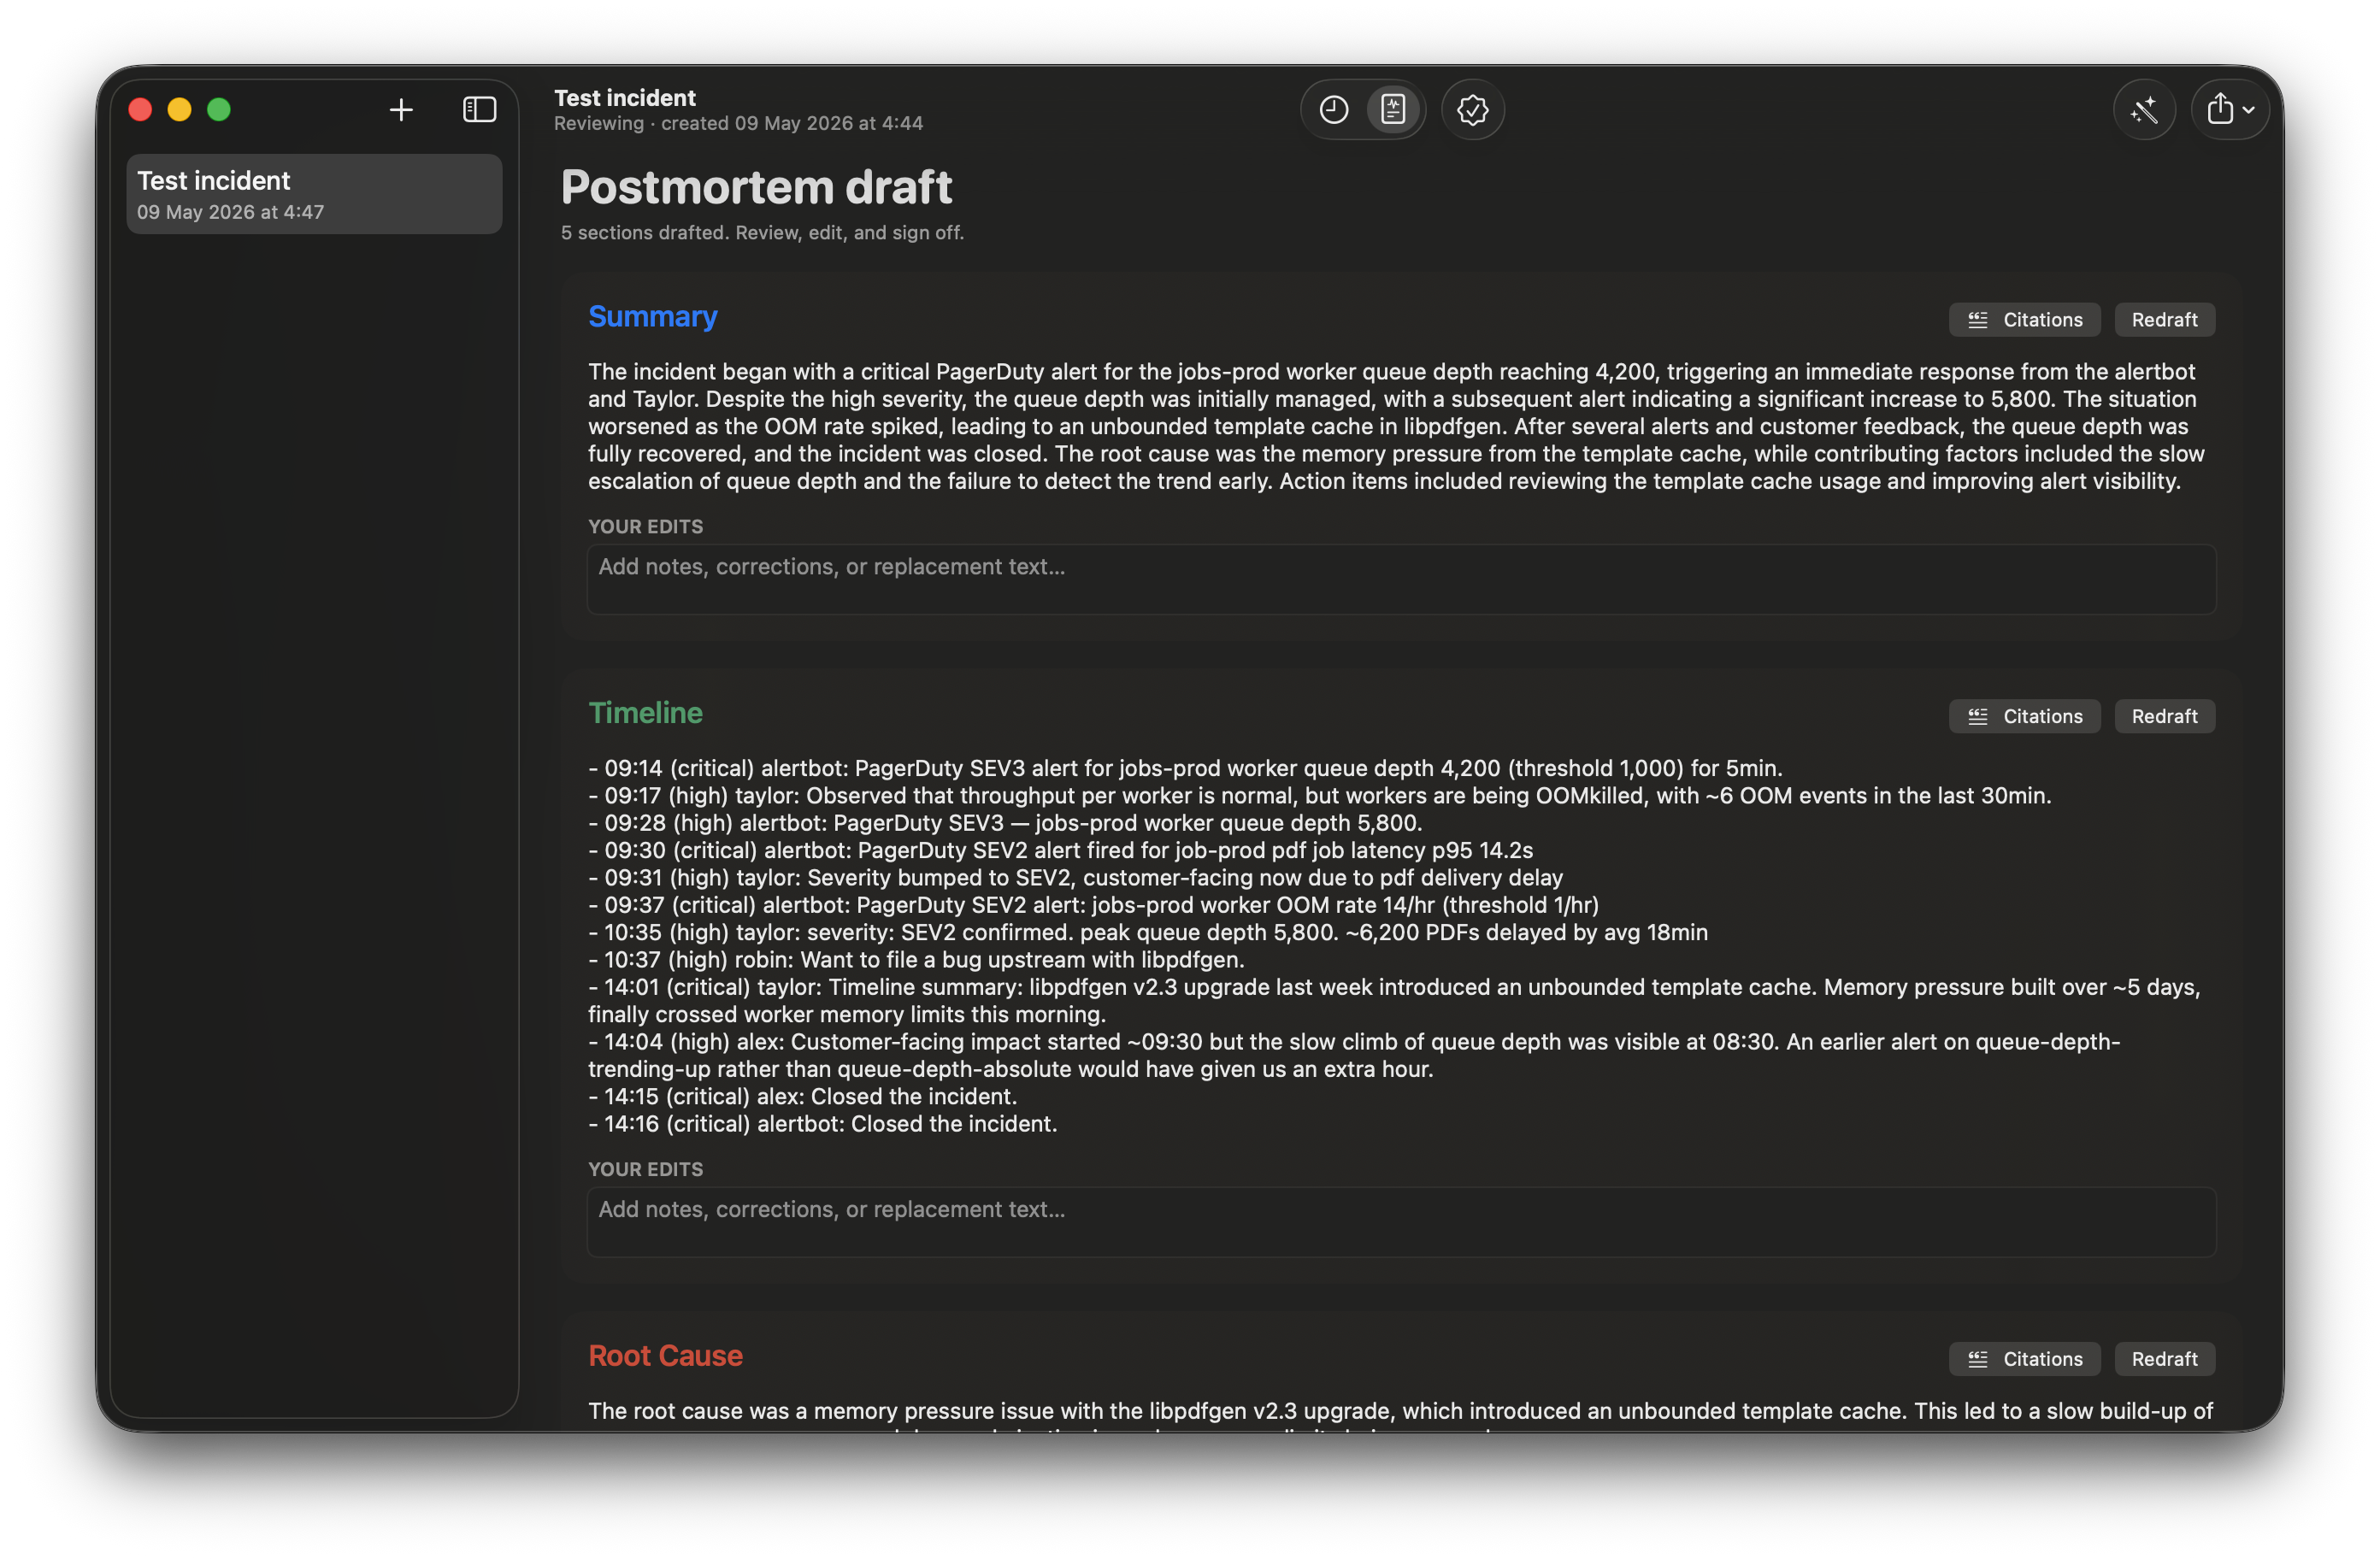
Click Draft all in the toolbar (or press ⌘⇧D). The model drafts the five canonical postmortem sections, one at a time, from top to bottom:
- Summary — a paragraph stating the incident in plain English.
- Timeline — a chronological render of the structured timeline (this section is deterministic from the events, not modelled).
- Root Cause — the failure mode, derived from the cited timeline events.
- Contributing Factors — secondary effects that amplified the impact.
- Action Items — a bulleted list with owners, derived from explicit commitments made in the chat.
Each section streams in as it’s drafted. You can read along.
Every drafted claim cites the timeline events that justify it. Click any sentence to open the Citations inspector:
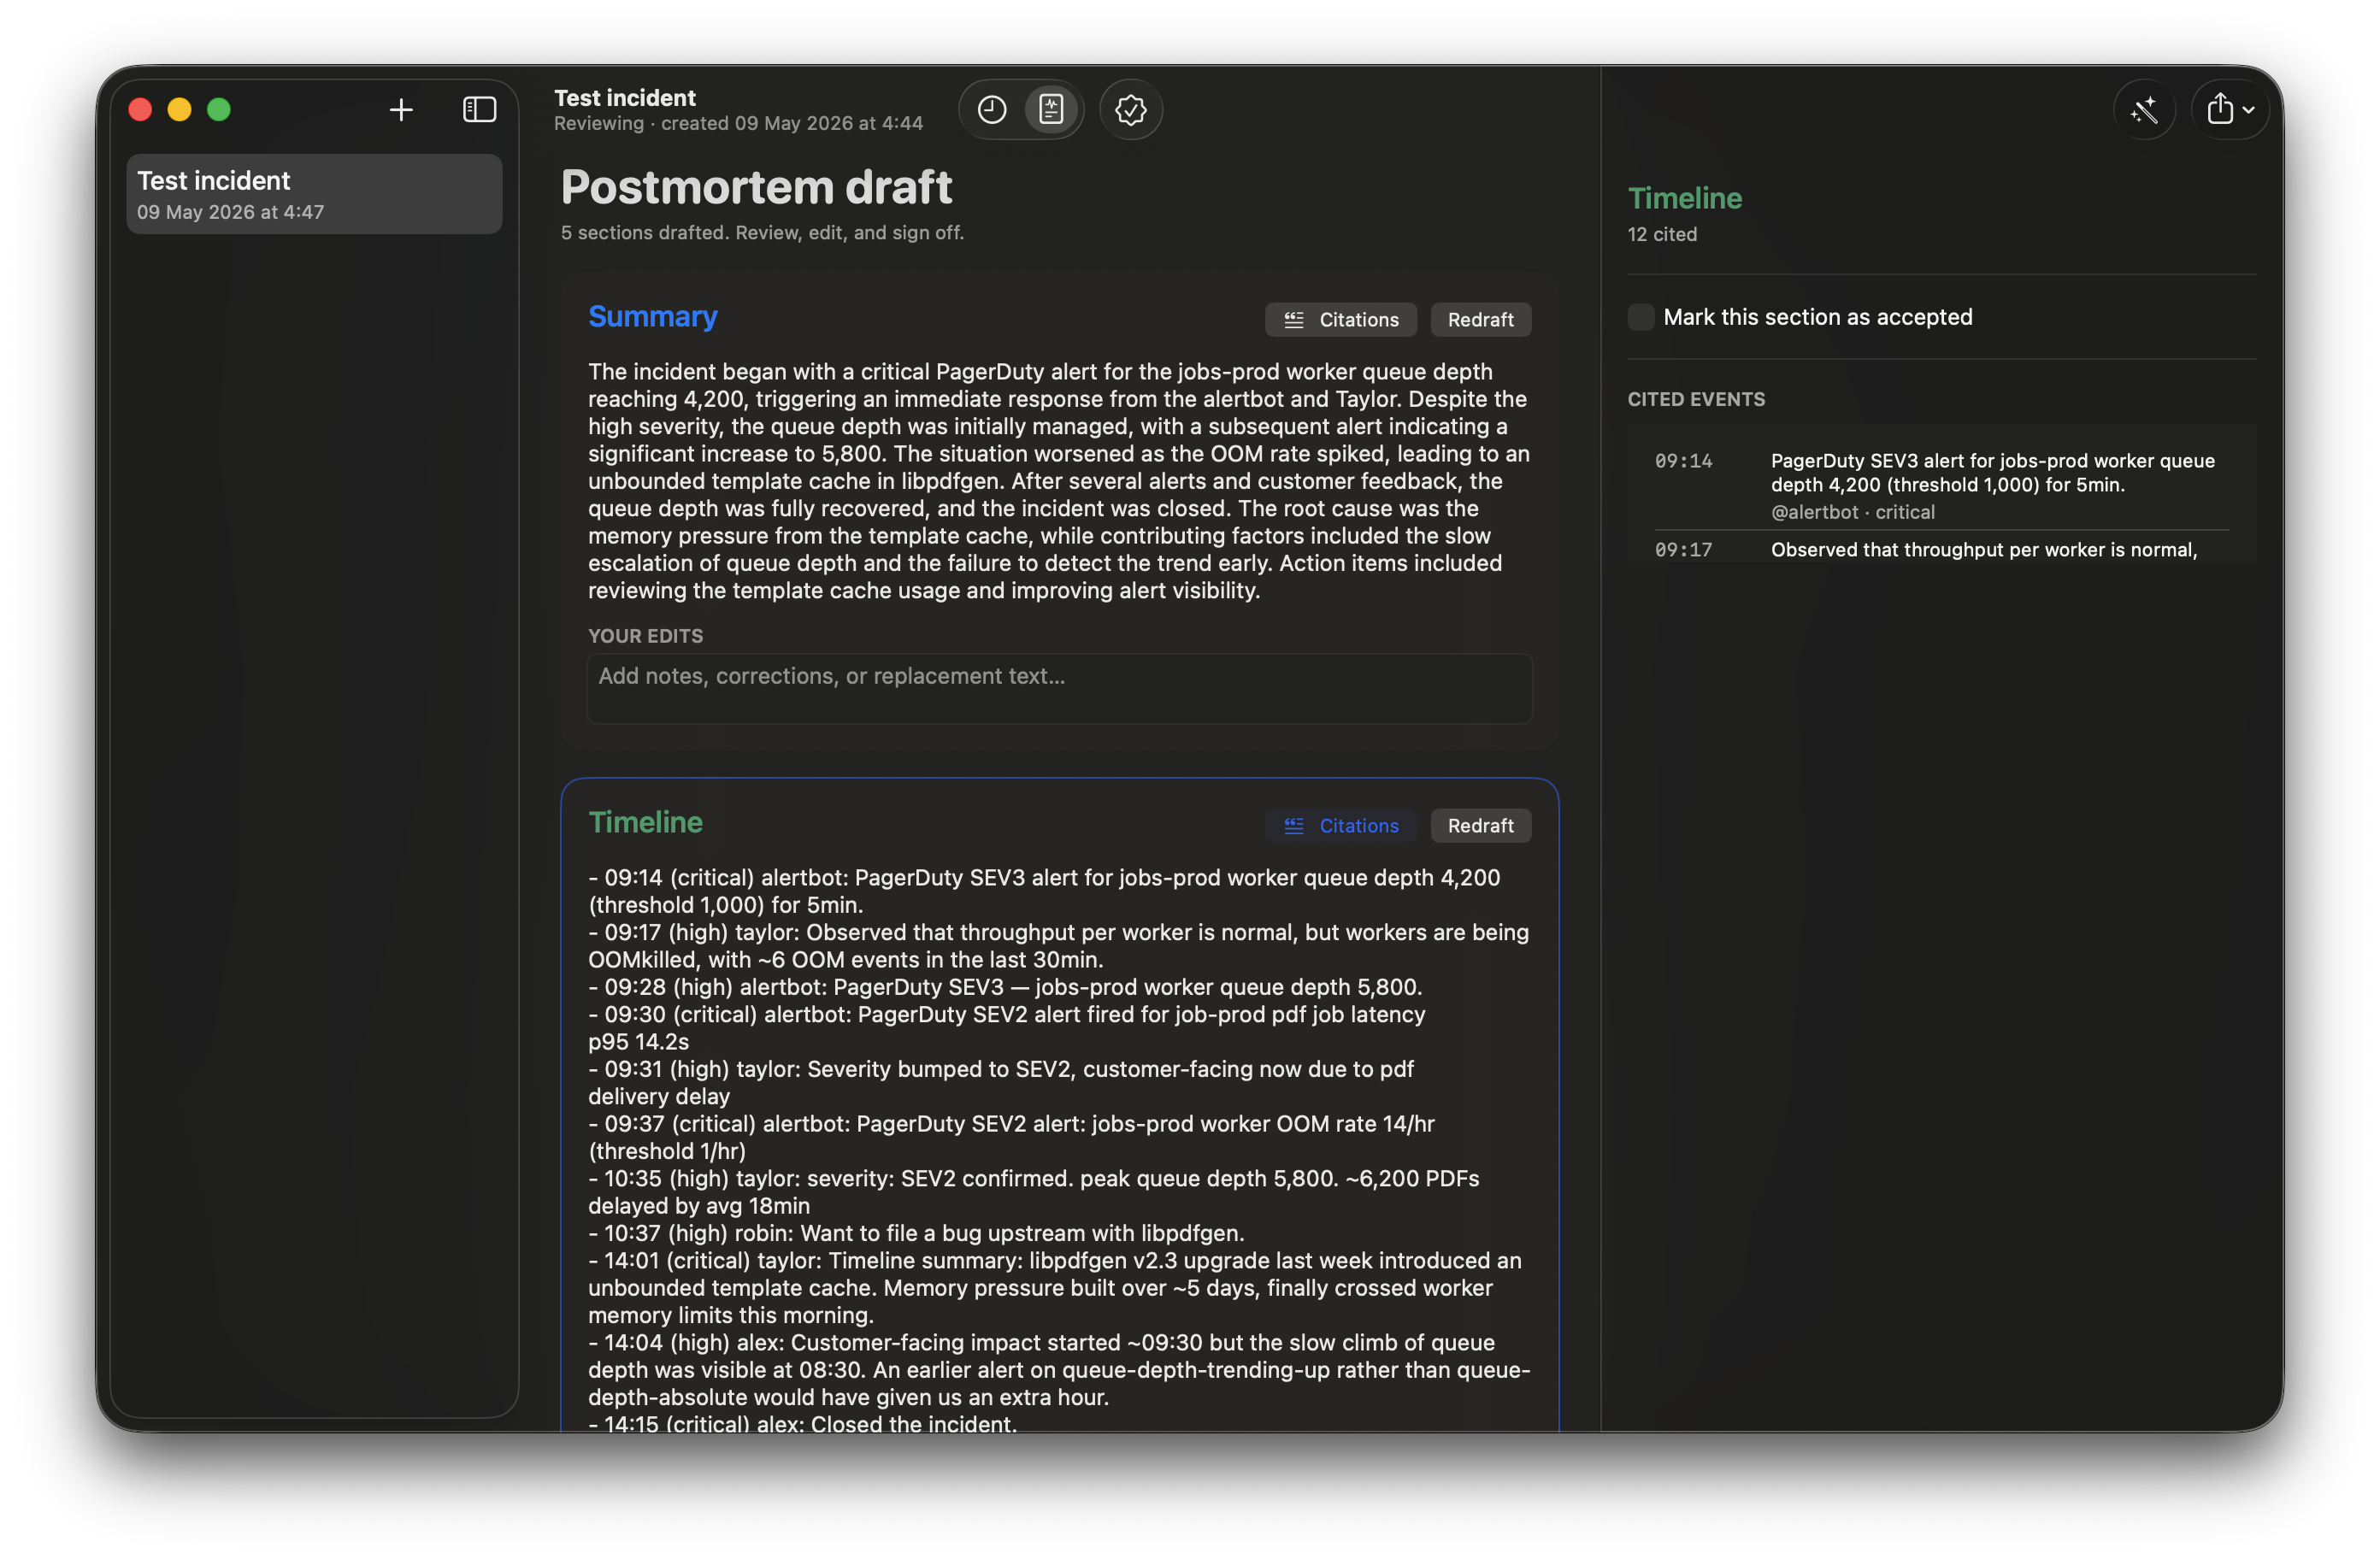
If a section is drafted against sparse evidence — say, there wasn’t enough chat about the contributing factors — that section shows a “low confidence” chip next to its header. You won’t miss it. (Read more about how the citation chain works.)
Step 4 — Edit and sign off (≈30 seconds)
Each section card has an inline editor for your own corrections, additions, or replacement text. Your edits are preserved separately from the model’s draft — if you re-draft later, your edits don’t get clobbered.
When the draft reads correctly, click Sign off in the toolbar. The incident transitions to signed-off, and the draft is locked from re-drafting (you can still edit text, but the model won’t touch it again unless you explicitly unlock).
Step 5 — Export to Markdown or PDF (≈10 seconds)
Click Export in the toolbar and choose Markdown or PDF.
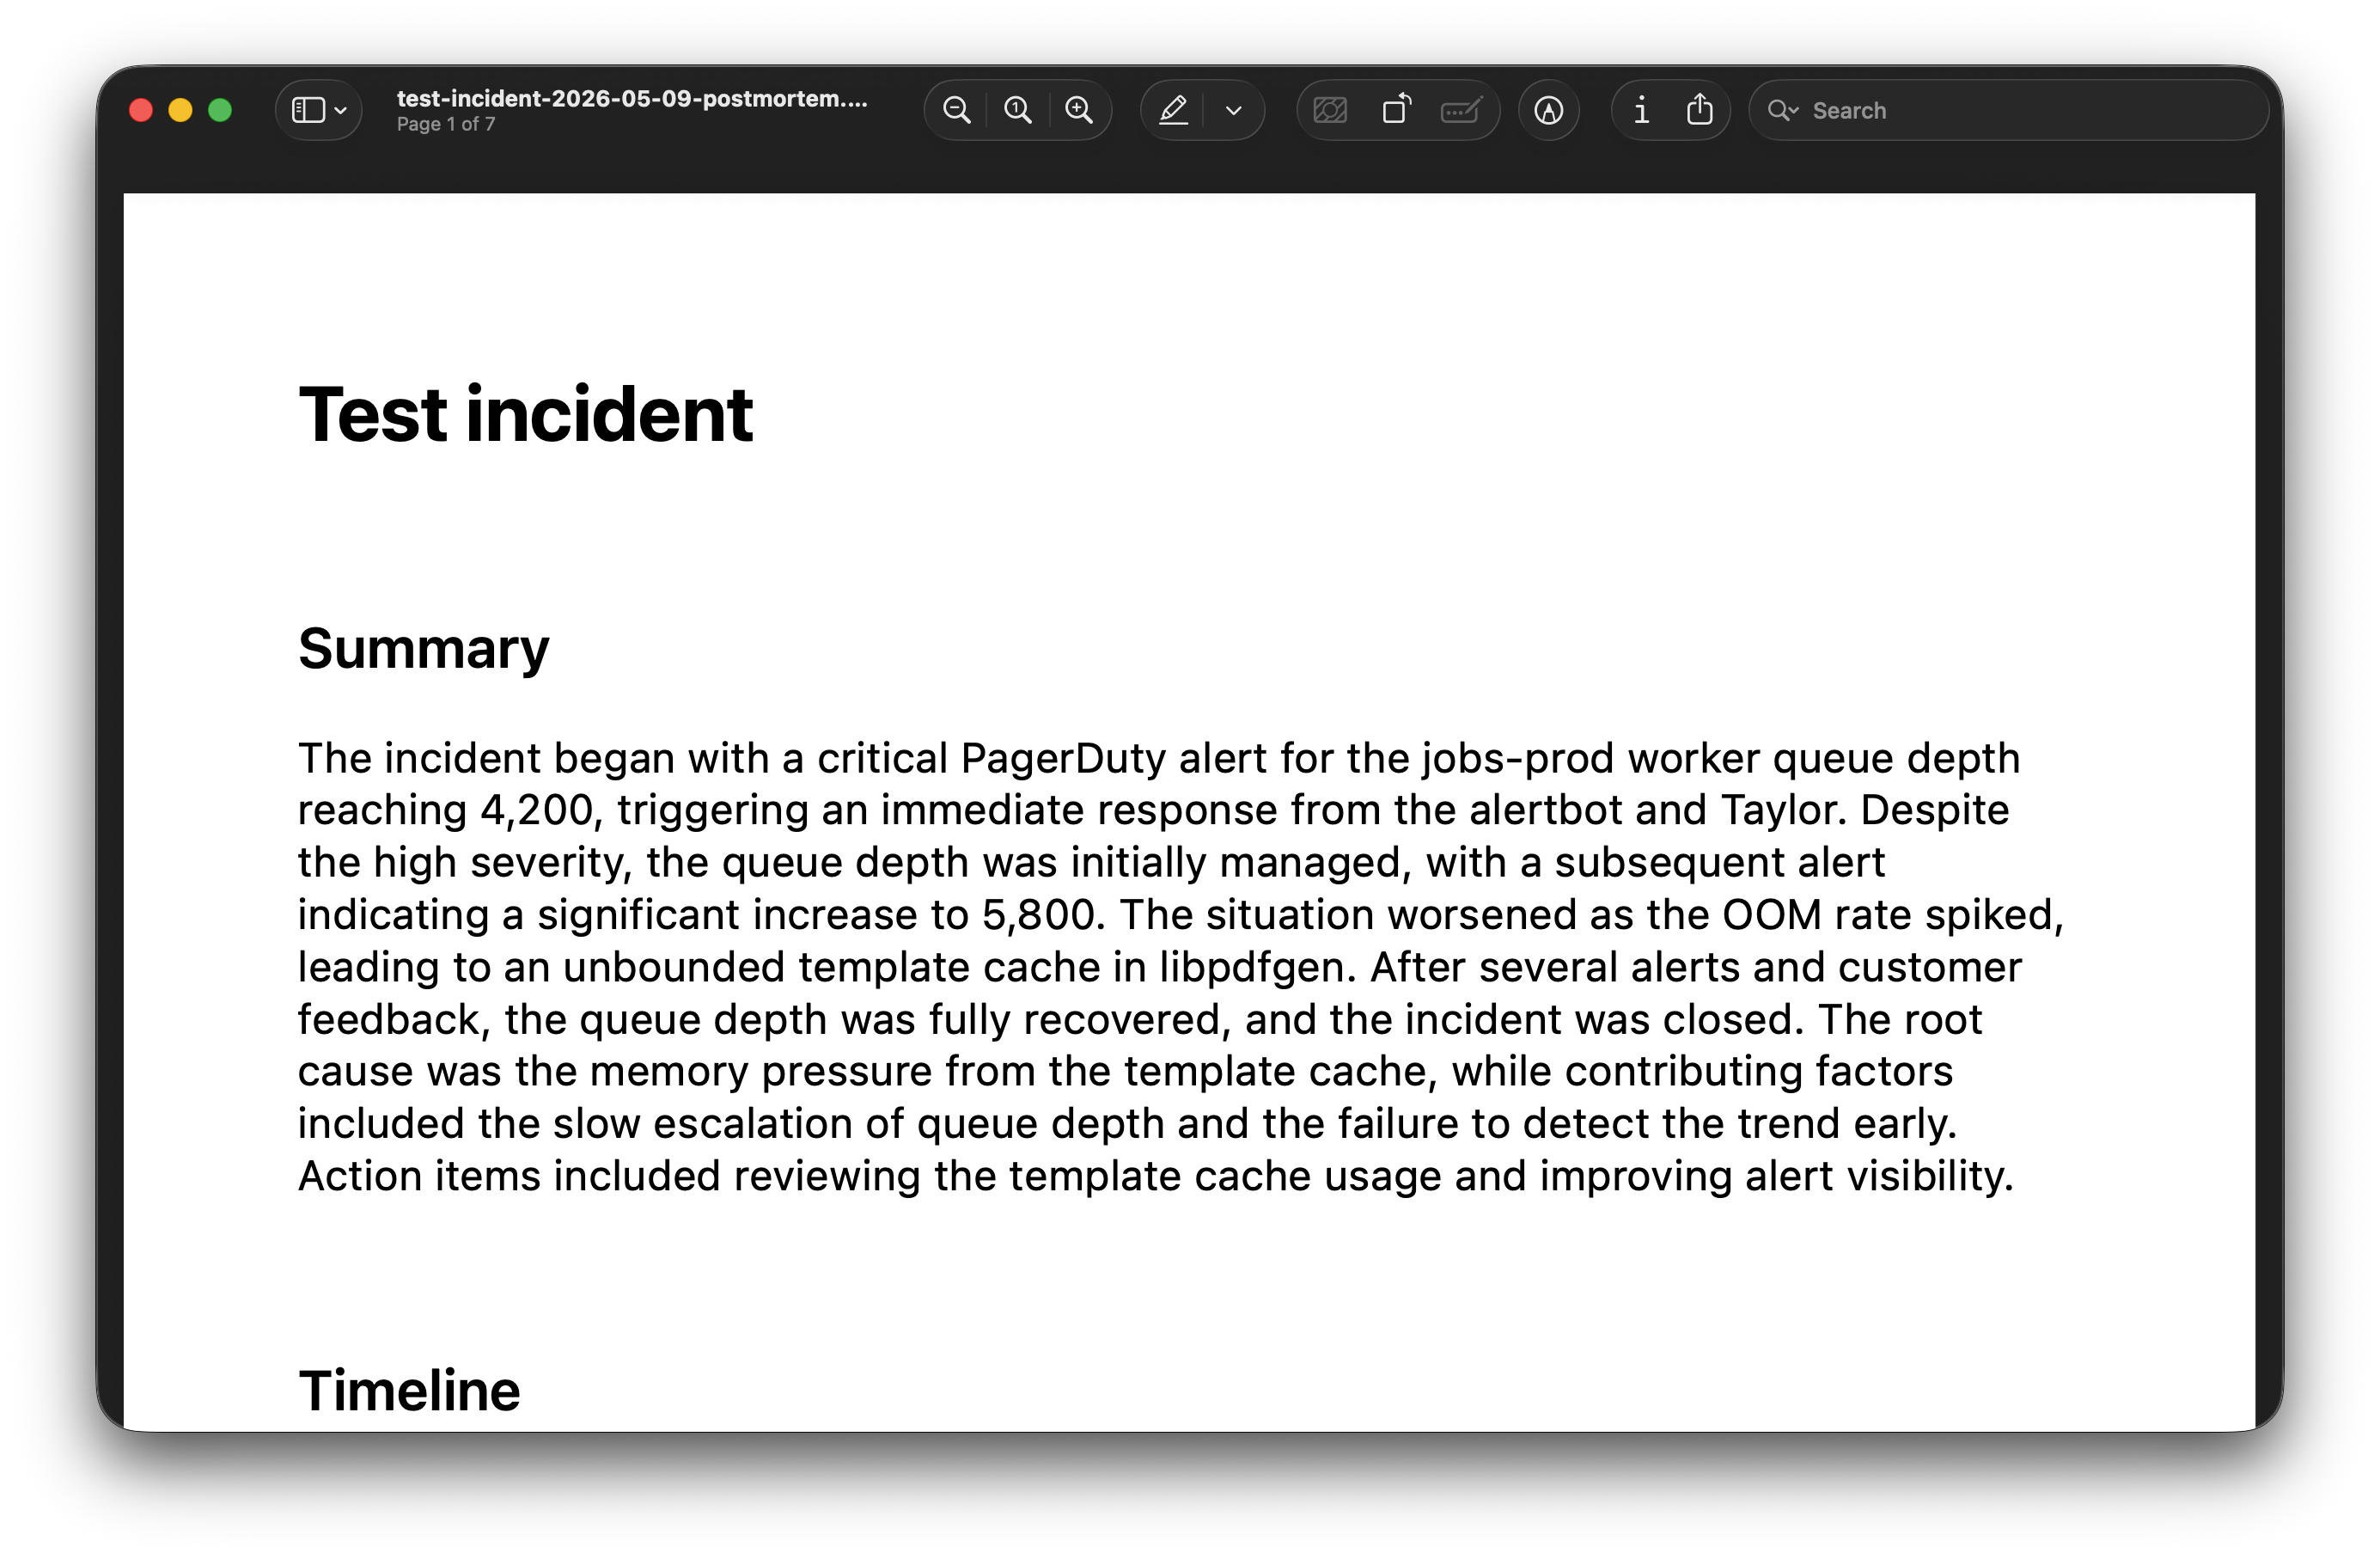
The Markdown export uses footnote-style citations that link to a per-event definitions block at the bottom. Paste straight into Confluence or Notion. If your destination doesn’t render footnotes cleanly, toggle Minimal (strip citations) before exporting for a clean copy-paste.
The PDF export is the immutable record — same content, same citations, frozen at sign-off time. Drop it into the incident archive.
What you have at the end
A five-section postmortem, drafted from a 90-line Slack export, with every claim two clicks from its source line. No incident text crossed your machine boundary. The whole pipeline ran on Apple Intelligence on your Mac. Total time: about three minutes.
The same workflow handles 4,000-line incident dumps; it just takes proportionally longer to extract (the validation + draft passes scale per-event, not per-chunk). The longest incident we’ve drafted from started with a 6,800-line Slack export and finished a signed-off postmortem in about 11 minutes.
If you want to try it on a real incident of your own — open IncidentScribe and drag in your last Slack export. The first run takes a few extra seconds while Apple’s on-device model warms up; subsequent imports are faster.